Get your home interior design budget estimate


-
Trending articles
-
![Beautifulhomes]() 40W Edison Filament Small Cylinder E-27 Bulb (BL2-10023)
40W Edison Filament Small Cylinder E-27 Bulb (BL2-10023) -
![Beautifulhomes]() Look At Me (Smokey Grey) Pendant Light
Look At Me (Smokey Grey) Pendant Light -
![Beautifulhomes]() 20 traditional living room ideas to decorate your living room
20 traditional living room ideas to decorate your living room -
![Beautifulhomes]() Living sustainably means living frugally, says the founder Budget-friendly Living Room
Living sustainably means living frugally, says the founder Budget-friendly Living Room -
![Beautifulhomes]() 20 traditional living room ideas to decorate your living room
20 traditional living room ideas to decorate your living room
-
- Book free site visit


-
![Commodo in venenatis suscipit quam Full of writing, reports, and recommendations.]() 40W Edison Filament Small Cylinder E-27 Bulb (BL2-10023)
40W Edison Filament Small Cylinder E-27 Bulb (BL2-10023) -
![Commodo in venenatis suscipit quam Full of writing, reports, and recommendations.]() Look At Me (Smokey Grey) Pendant Light
Look At Me (Smokey Grey) Pendant Light -
![Commodo in venenatis suscipit quam Full of writing, reports, and recommendations.]() 20 traditional living room ideas to decorate your living room
20 traditional living room ideas to decorate your living room -
![Commodo in venenatis suscipit quam Full of writing, reports, and recommendations.]() Living sustainably means living frugally, says the founder Budget-friendly Living Room
Living sustainably means living frugally, says the founder Budget-friendly Living Room -
![Commodo in venenatis suscipit quam Full of writing, reports, and recommendations.]() 20 traditional living room ideas to decorate your living room
20 traditional living room ideas to decorate your living room
-

Home Design Ideas

-

Living Room Designs
-

Bathroom Designs
-

Study Room Designs
-

False Ceiling Designs
-

Tile Designs
-

Hallway Designs
-

Modular Kitchen Designs
-

Dining Room Designs
-

Balcony Designs
-
Home Office Designs
-

Bed Designs
-

TV Unit Designs
-

Bedroom Designs
-

Pooja Room Designs
-

Wardrobe & Cupboard Designs
-

Crockery Unit Designs
-

Flooring Designs


-


Design Ideas
-


Services
-


Decor
-


Editorial
-


More


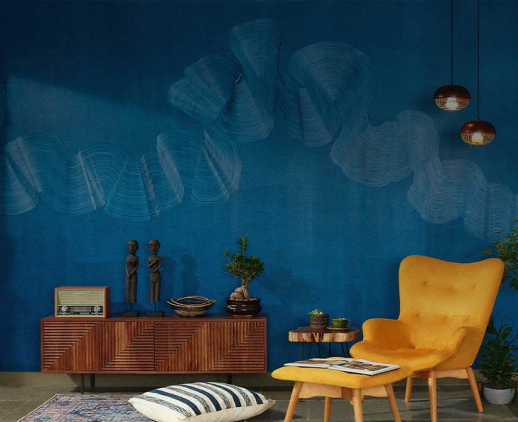
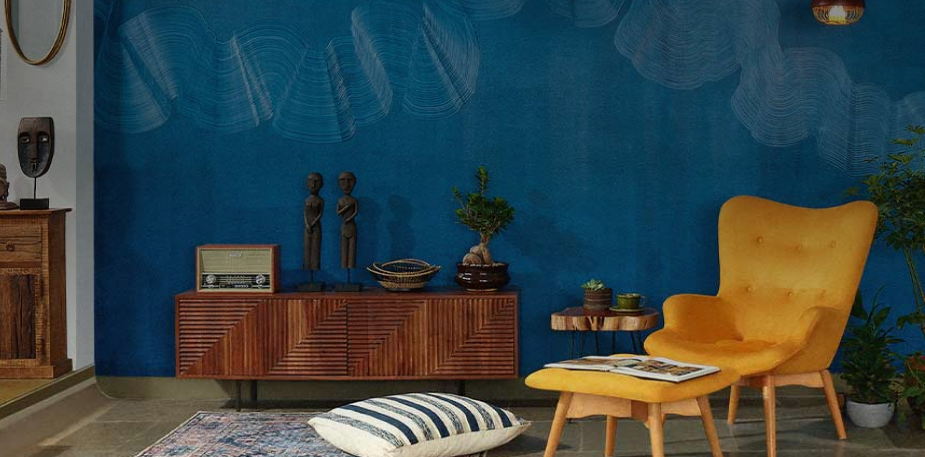
How to paint your wall Ombre


Paint your walls Ombre this season with our latest DIY tutorial
Materials required:
- Foam blocks – 2 pieces
- Plastic paint – Colour of your choice (We used Royale Play by Asian Paints)
Quantity: 2 litres each - Shade: Fresh Carrot - 9397, Milky way - L102 (both from Asian Paints)
- Water as required
- Tray
Note: Royale play blends well, which is intrinsic to this method

Method:

1. Ensure the wall is perfectly even and white or of the base colour you want.
2. Divide the whole wall horizontally in 3 sections. The bottom most needs to be painted the original shade moving up to a slightly lighter one, and ending with the lightest shade. Starting from the bottom section of the wall, dab the foam in the paint and make impressions on the wall. Move the foam towards left and right so that the pattern does not look one-directional. Cover 1/3rd of the wall horizontally with this in the original shade of the colour of your choice.


3. Now dab the foam in little water and drain some of the paint from the foam, this will help make the colour a shade lighter. Apply a little pressure on the wall to blend the lighter shade in your hand with the darker one applied before. This is to ensure there is no prominent line seen in between the two colours. The key is in making the gradation appear as smooth and seamless as possible.
4. The third section, which is the top most needs to be the lightest. To achieve this, repeat the same process as the previous one to blend the darker shade under it with this section.


5. And just like that, your ombre wall is ready!

Get Started with your interior design journey with us!
Speak to our design professionals

Tell us more and you may qualify for a
Get tailored made designs from our interior design services by asian paints.
What’s the status of your home possession?
What’s the condition of your home/space?
Will you be living in your space during the renovation?
 Previous Question
Is your interior design budget over 4 lakhs?
Previous Question
Book next available appointment slots with our experts!
Please Select Date and Day
Previous Question

Something went wrong!
We were unable to receive your details. Please try submitting them again.


Appointment Scheduled!
Thank you for giving an opportunity to Asian Paints Beautiful Homes Service! Our Customer Experience Specialist will get in touch with you soon.
Appointment Date & time
Thank You!
Our team will contact you for further details.

Thank You!
Tell us more and you may qualify for a
What’s the status of your home possession?
What’s the condition of your home/space?
Will you be living in your space during the renovation ?
 Previous Question
Is your interior design budget over 4 lakhs?
Previous Question
Book next available appointment slots with our experts!
DEC 2023

Please Select Date and Day
Previous Question

Something went wrong!
We were unable to receive your details. Please try submitting them again.


Appointment Scheduled!
Thank you for giving an opportunity to Asian Paints Beautiful Homes Service! Our Customer Experience Specialist will get in touch with you soon.
Appointment Date & time
17 Oct 23, 03.00PM - 04.00PM